A single-run glucose repeatability study from start to finish, in about ten minutes. First download repeatability.csv: 21 synthetic results for control QC-001 in one run, with one result of 1004 already excluded with a reason. To plan your own study, use the repeatability guide.
You need the Owner, Administrator or Editor role.
Step 1: Open the New study dialog#
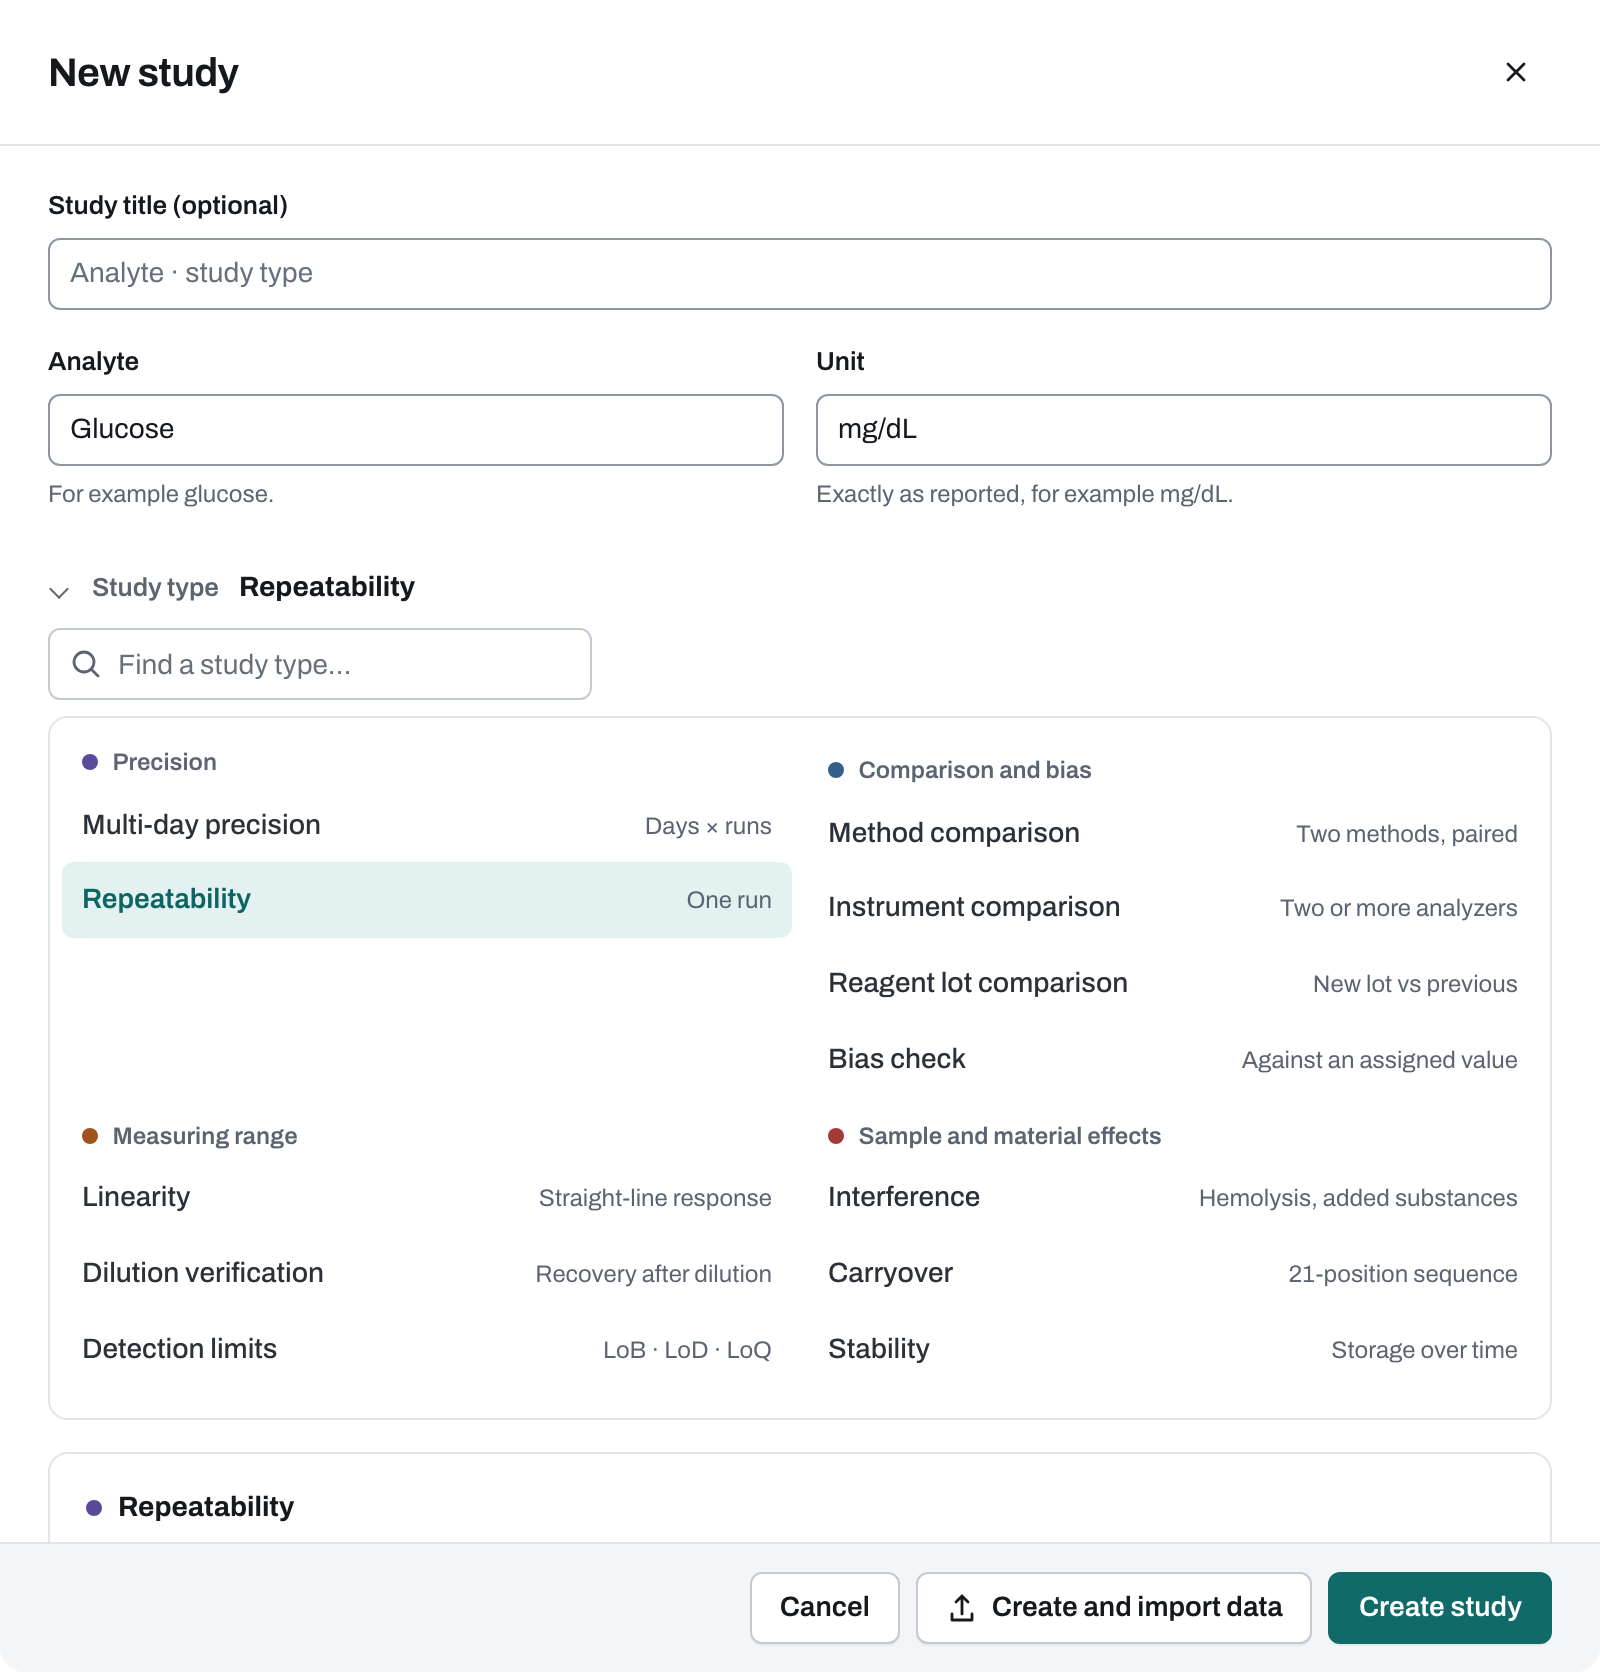
In an empty workspace, the Projects page opens on Start a study with every study listed. Select Repeatability, then Start this study: the New study dialog opens with that study chosen.
If you already have projects, select New study on Projects or inside a project. From Projects, the dialog starts with Project: pick one, or New project to make one named after the analyte.
Step 2: Create the study#
- Fill in:
- Study title (optional): leave blank to get
Glucose · repeatability. - Analyte:
Glucose - Unit:
mg/dL
- Study title (optional): leave blank to get
- Under Study type, select Repeatability under Precision, or type its name in Find a study type…. Its question, Suggested collection and what You get appear below the list, with Run this study, the full guide. Read it before collecting your own results.
- Select Create study. The study opens at Set up. In an empty workspace, a project named after the analyte, for example Glucose evaluation, is made for it. Edit project in Project details renames it and sets an optional Laboratory name for the report.
If you already have results, Create and import data creates the study and opens Import a file straight away.
Step 3: Review the plan#
Collection plan is open at the top of Set up until the study has data. It shows:
- the Suggested plan: 2 materials × 20 measurements in one run, 40 results. The Calculation minimum beside it is only what the software needs to calculate.
- four steps: 1 · Prepare, 2 · Decide before collecting, 3 · Collect and enter results and 4 · Check before reporting.
The walkthrough file has one material, which is enough to learn the steps.
Below the plan, check Study details: Analyte Glucose and Unit mg/dL. Leave Calculation settings as they are. See study setup.
Step 4: Add your laboratory's limit#
Set the limit before you collect.
- Under Acceptance limits, select Enter your own limit.
- Under What to limit, choose Repeatability CV.
- Fill in:
- Largest acceptable CV (%):
2 - Applies to level: keep
*for all levels.
- Largest acceptable CV (%):
- Select Add limit, then Save changes. The limit reads Sample CV must be ≤ 2 %.
The 2% limit is an example. Use the limit your laboratory approved. See acceptance limits.
Step 5: Enter the results#
- Open Data. With no rows yet, it shows Import a file. Select it.
- Choose
repeatability.csv. The dialog reads it: 1 level (1), 21 replicates each: 21 results, with Repeatability marked ready. - Select Import into this study.
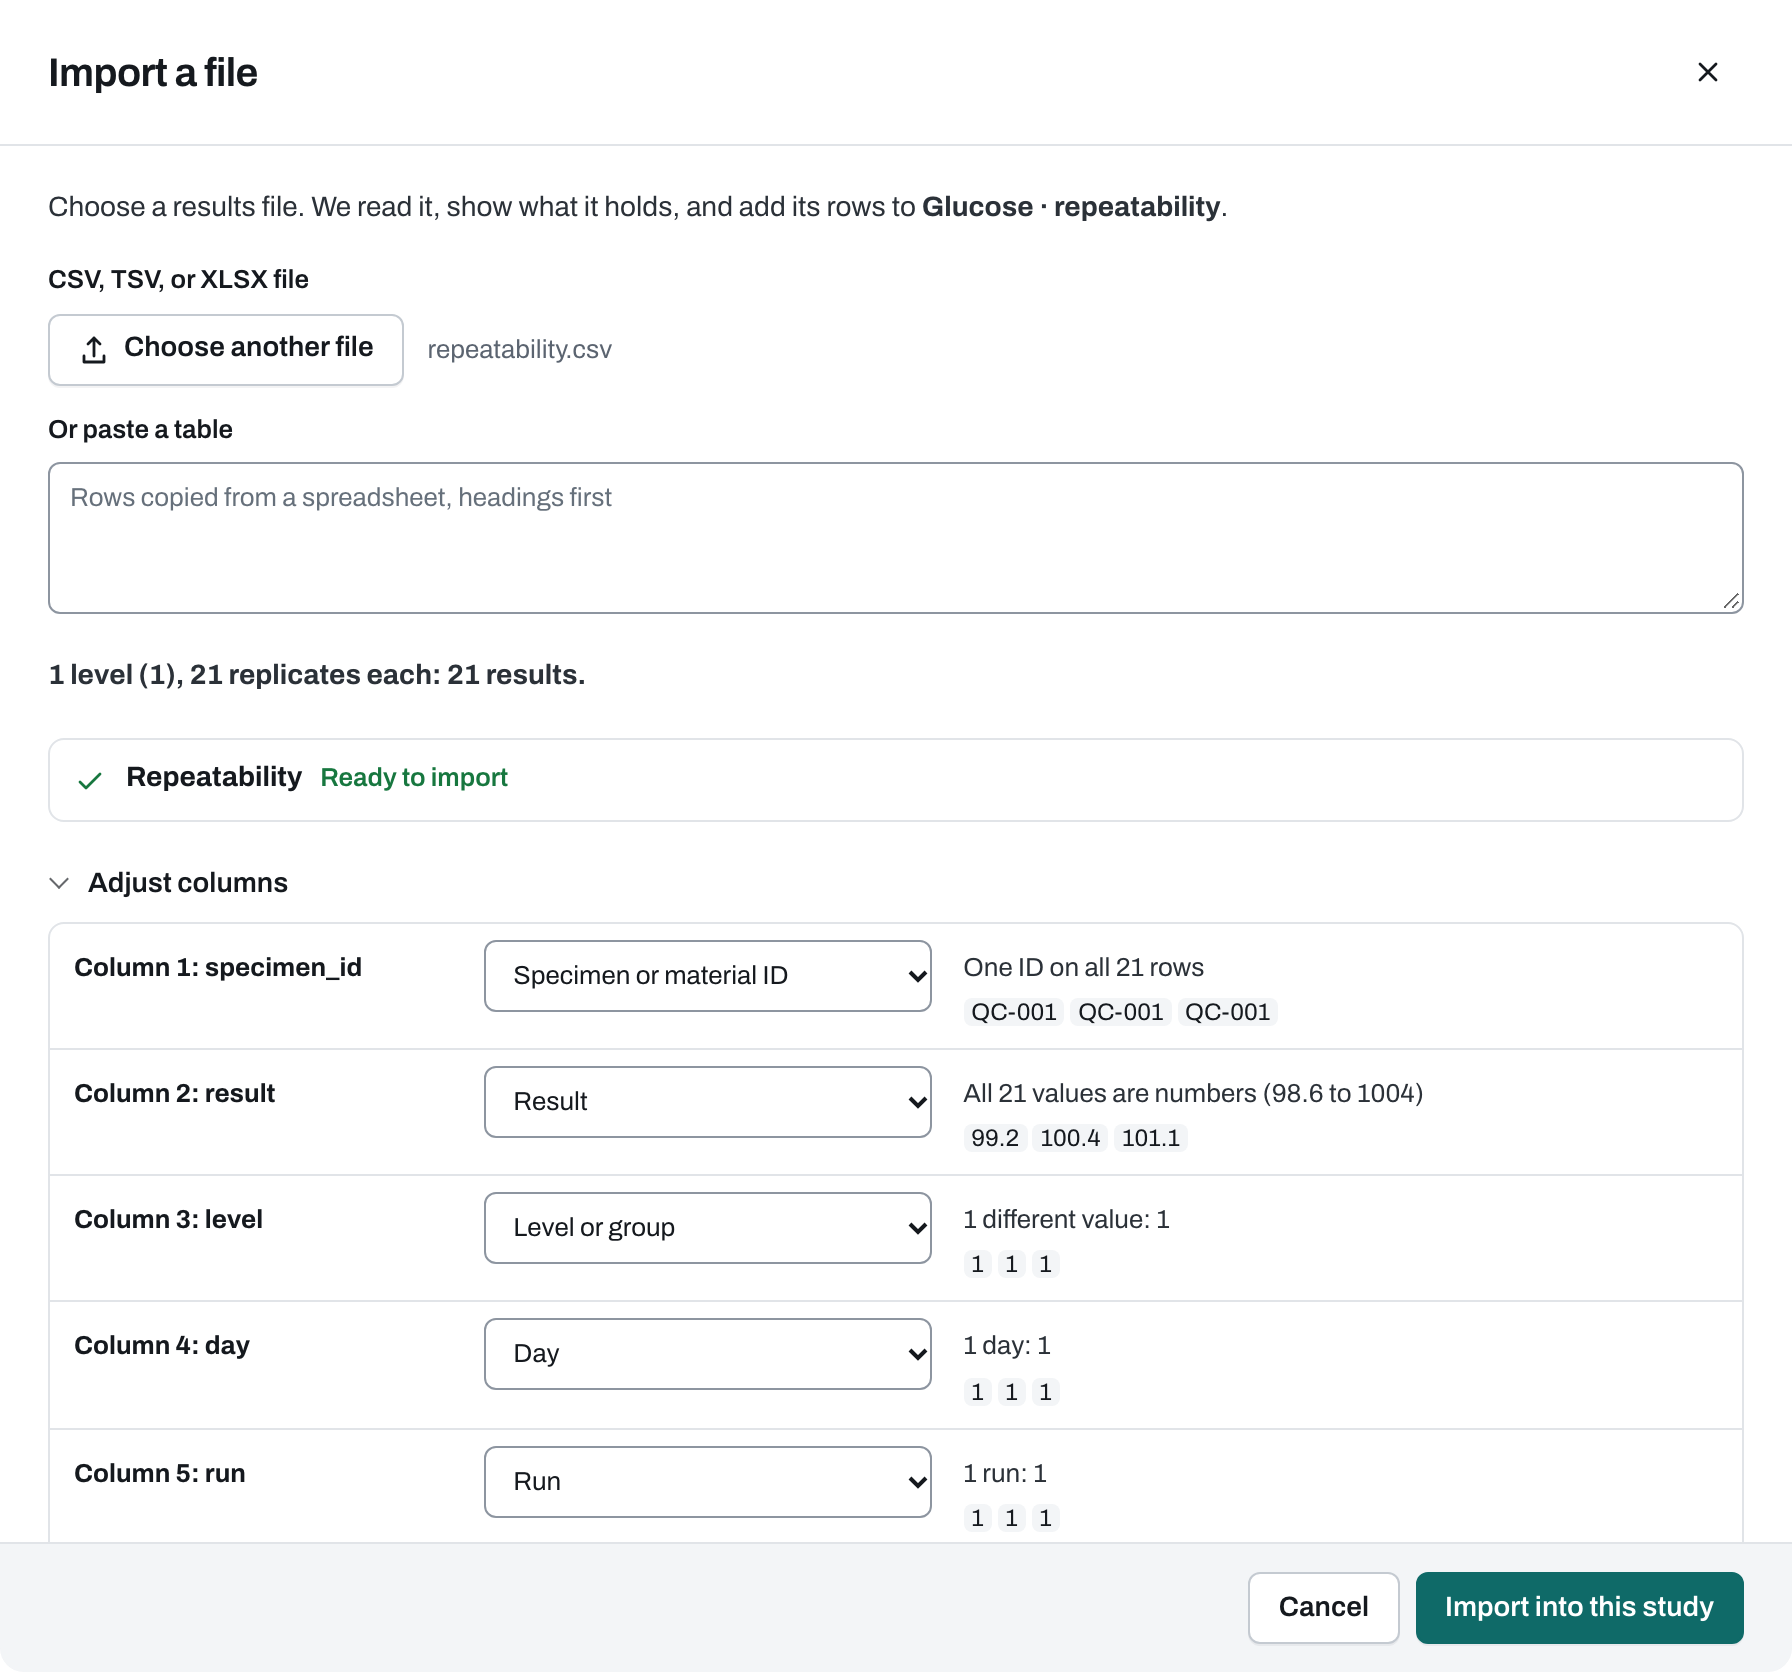
The grid shows 21 rows, with row 9 (1004) marked Excluded. See importing a file.
Step 6: Calculate results#
Select Calculate results in the study header. The Results stage opens.
Step 7: Read the results#
The top of the page shows Criteria met with 20 analyzed · 1 excluded. Why, directly below, lists CV: observed 0.93%, limit ≤ 2%, Met. Select the limit's name to open it on Set up.
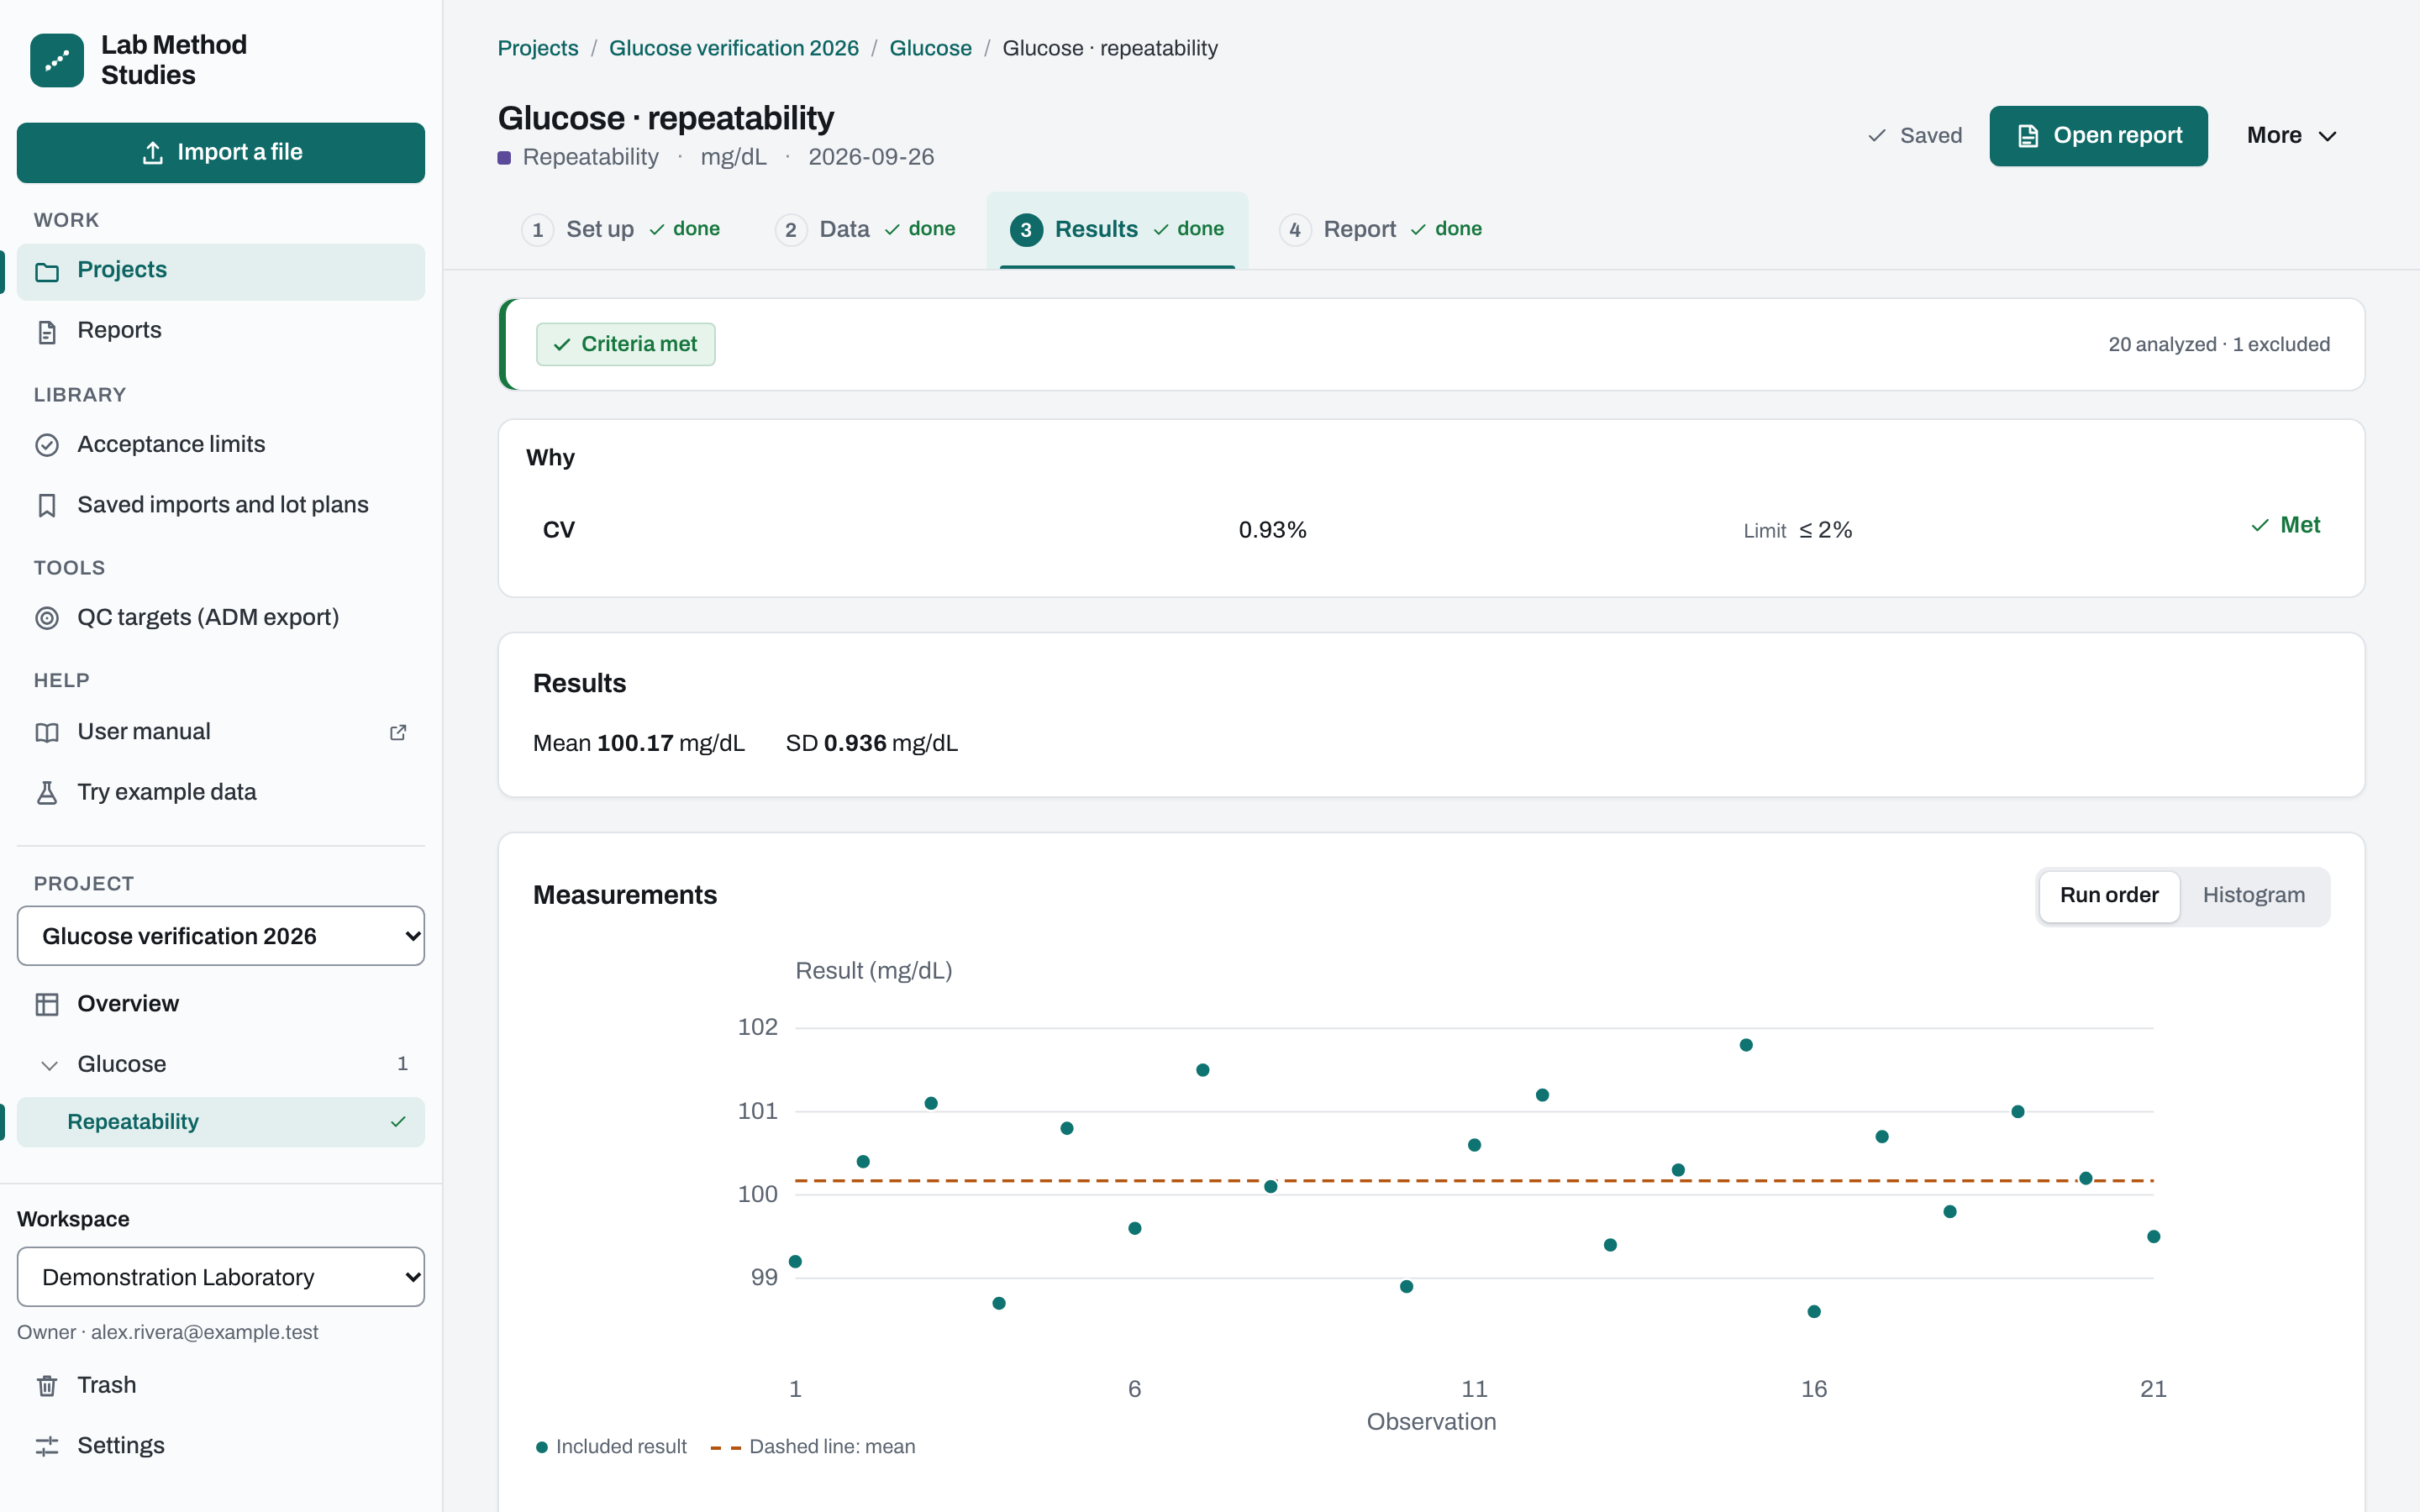
Check the Measurements plot in Run order for drift or sudden shifts. Additional statistics and calculation history has the full table.
| Statistic | Displayed value |
|---|---|
| Included results (N) | 20 |
| Excluded results | 1 |
| Mean | 100.17 mg/dL |
| Median | 100.25 mg/dL |
| Repeatability SD | 0.936 mg/dL |
| CV | 0.93% |
| Minimum / maximum | 98.60 / 101.80 mg/dL |
| 95% CI for mean | 99.73–100.61 mg/dL |
| CV | Met (observed 0.93%, limit ≤ 2%) |
The excluded 1004 is left out of these numbers. The limit uses the full-precision CV. The 20 results are repeats of one material in one run, so they describe within-run variation. See uncertainty and denominators.
Step 8: Print or download the report#
- Open Report to view the report.
- Select Download PDF, or Print. Tables, plots and copies, including Black & white copy (PDF), are under Other downloads. Include technical details adds diagnostics, detailed methods and the audit trail. Open full page shows the report on its own.
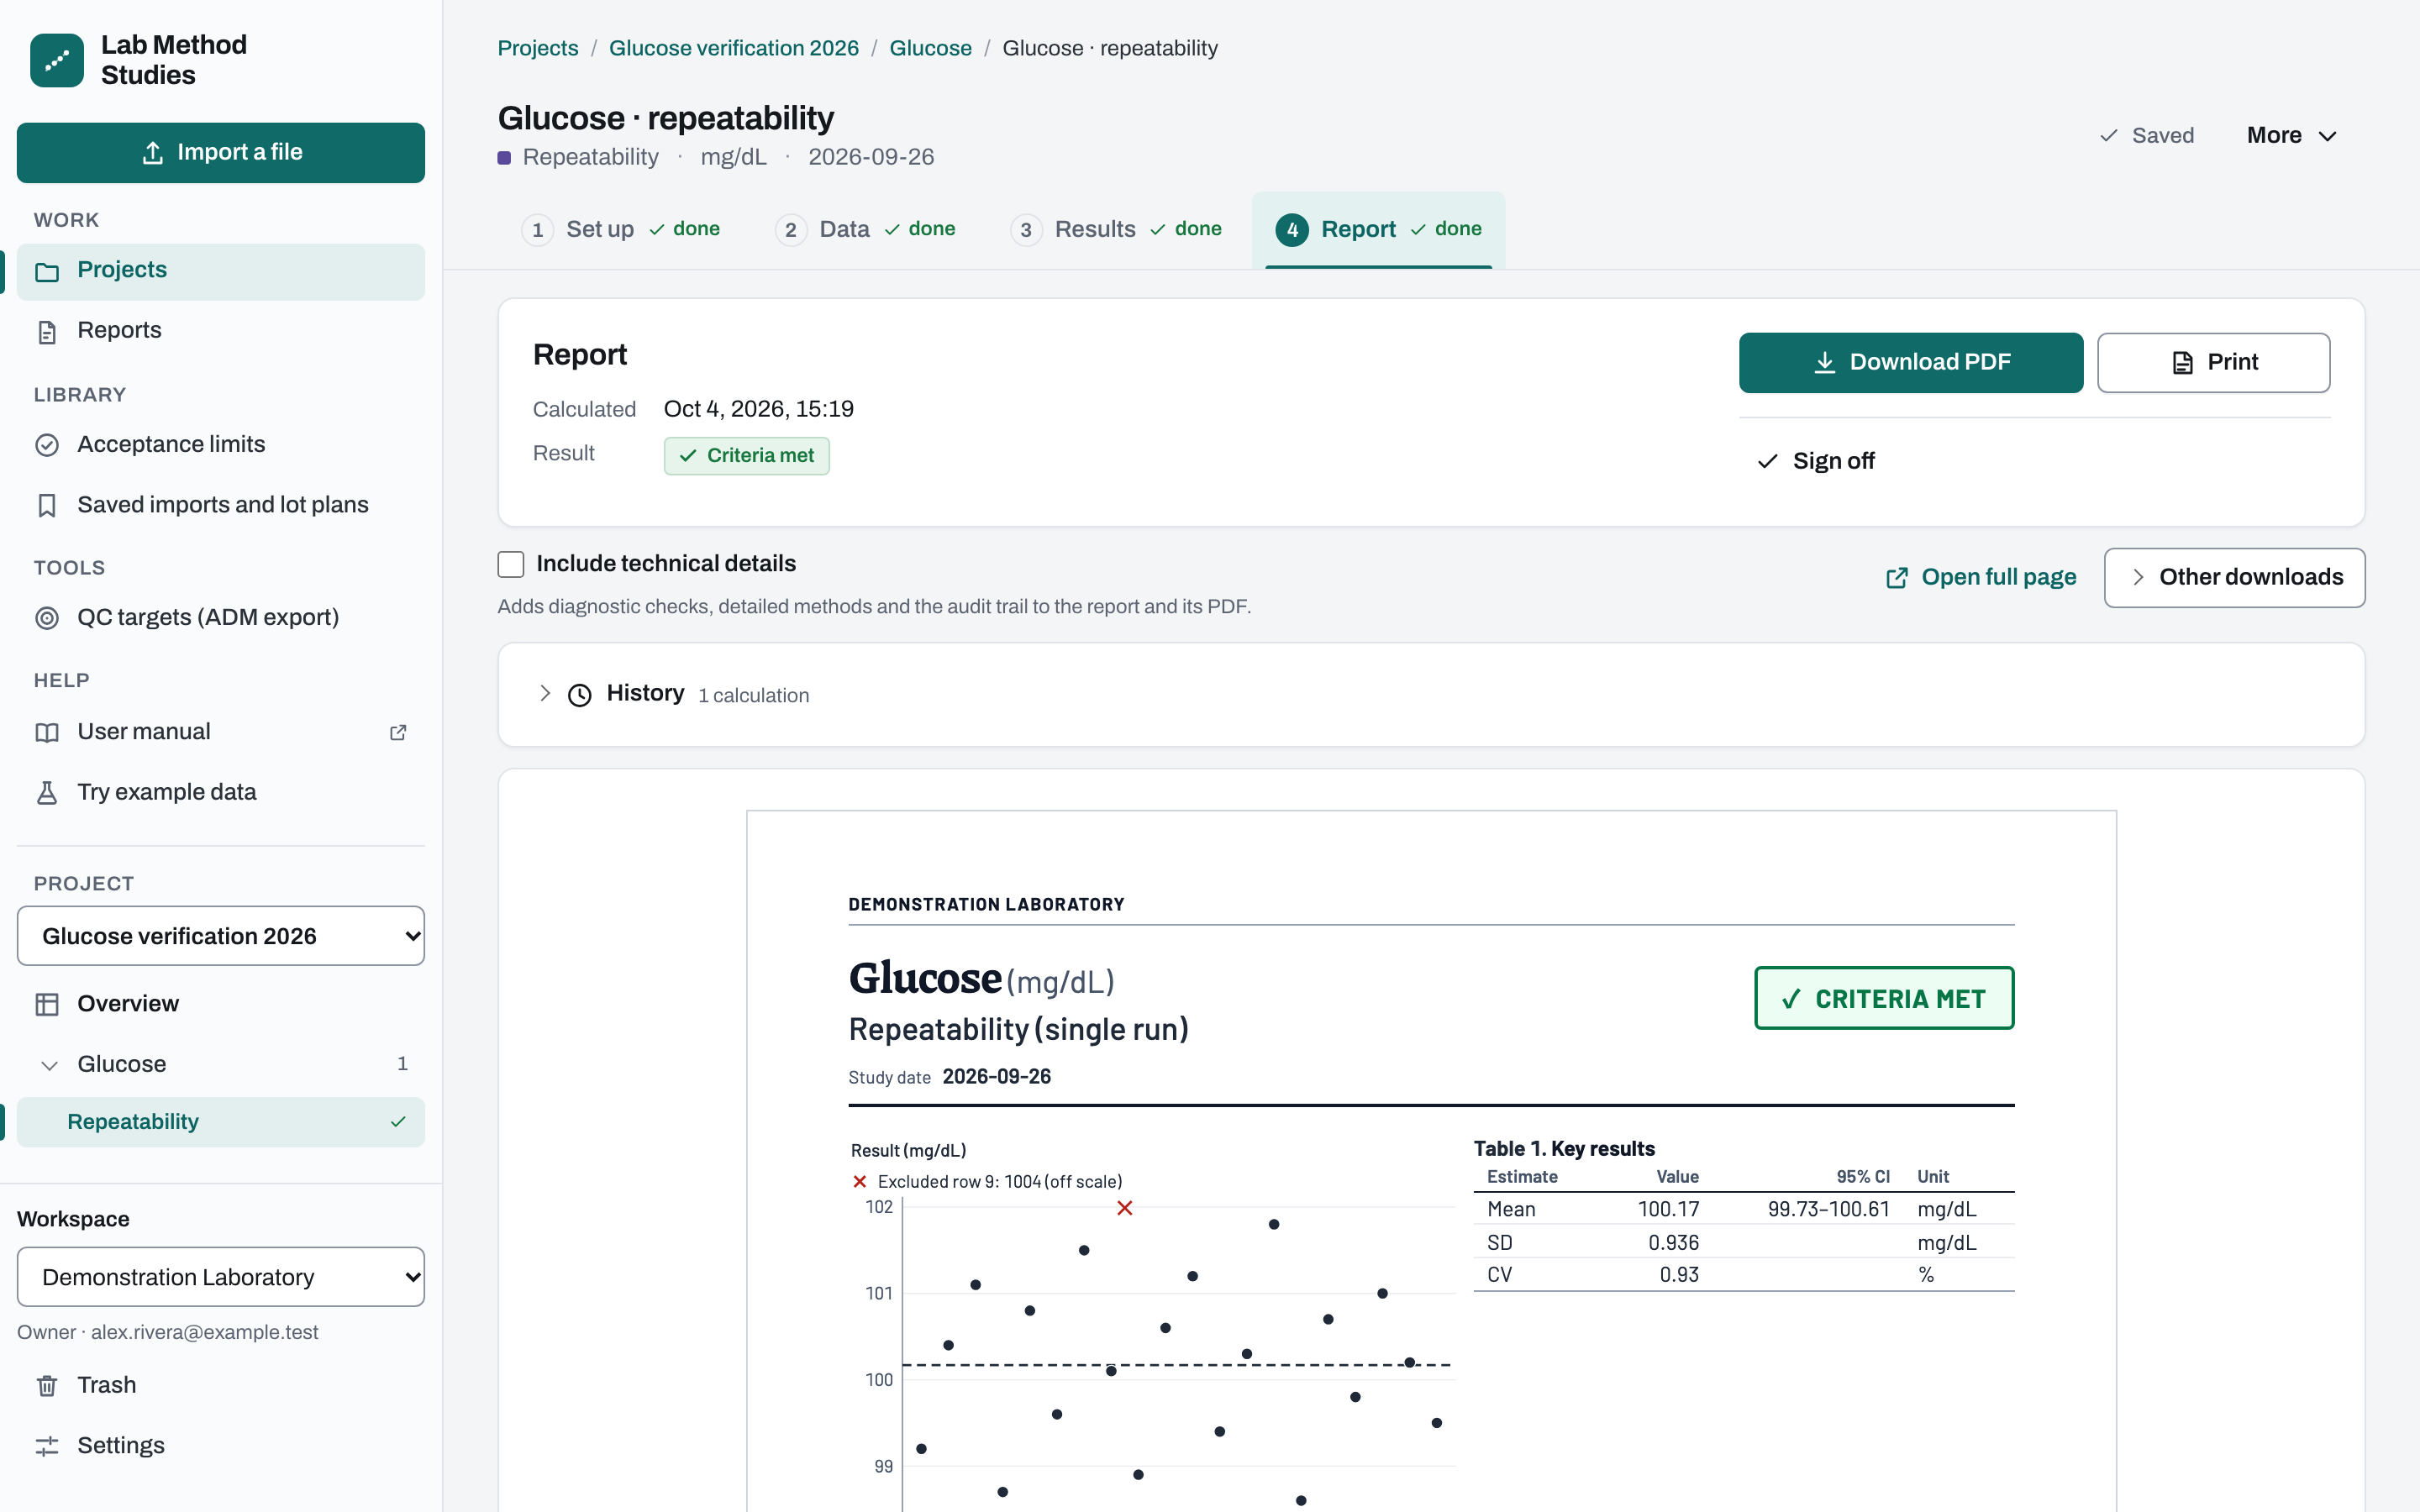
The data listing at the end lists every row, including the excluded 1004 and its reason.
Step 9: Sign off (optional)#
To record who reviewed the report, select Sign off, add a name if you want, and confirm. The date and time are added for you and fill in the signature lines on page 1. The signed report stays as it was; later corrections make new calculations. See signing off.
See also the repeatability chapter and corrections and exclusions.